Glossary
Make your content easier to understand with clear definitions that show up exactly when and where readers need them. Glossary adds smart, accessible popover definitions to your site and helps search engines and AI tools understand your terminology.


What Glossary does
Smart linking that you can control
Glossary automatically finds the terms you’ve defined and highlights the first mention in your posts. You’re in the driver’s seat: you can turn off linking for specific words (like if you want “WordPress” in your list but don’t want it linked in every single post) or set them to be case-sensitive—so “FAIR” gets a definition, but “fair” stays as regular text.
Definitions at a click
When a reader wants to know more, they simply click the term to see a quick definition right there on the page. We’ve updated this to respond to clicks rather than hovers, so definitions don’t pop up by accident while someone is just trying to read. It’s also built to work perfectly for everyone, including people who use keyboards or screen readers to browse.
How the Glossary plugin works
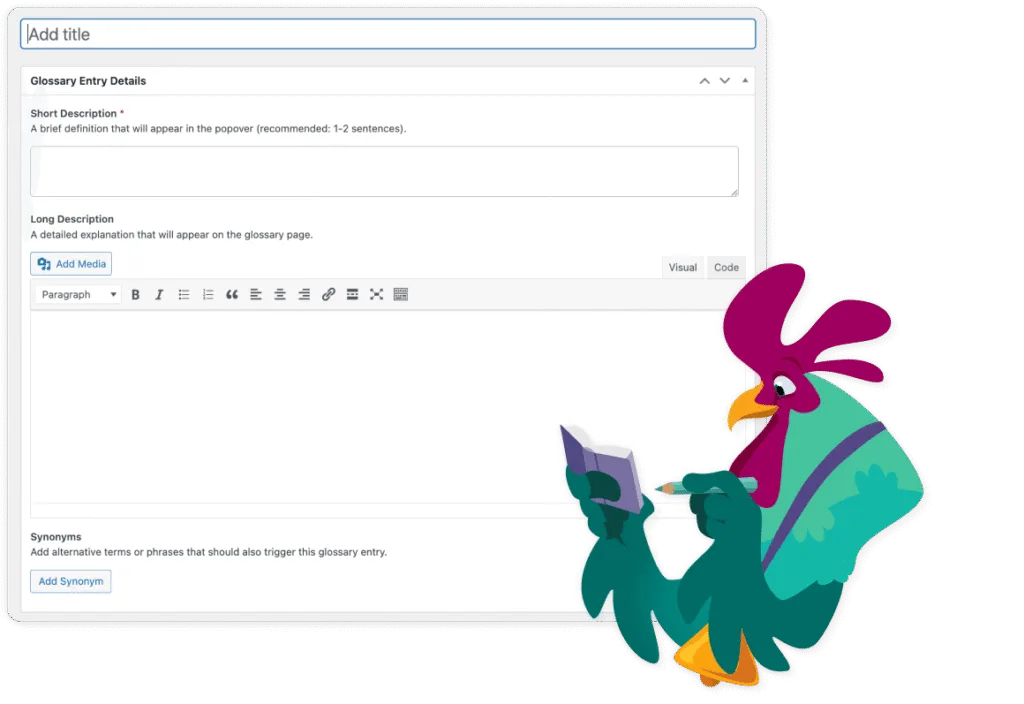
Easy glossary management
Each glossary entry has a simple layout. Add a short description and a full definition. The plugin also supports synonyms. You can add alternative names and acronyms so your glossary covers the terms your audience actually uses.
The Gutenberg block builds a clear alphabetical overview for your glossary page. You keep everything tidy without extra configuration.
Powerful Schema integration
Glossary adds DefinedTerm and DefinedTermSet schema to your site, which helps Google and AI tools understand your terminology. It integrates with Yoast SEO and extends the schema graph when Yoast is active. If Yoast is not installed, it falls back to Microdata.
Native WordPress and browser functionality
Everything runs on native WordPress and browser features. There are no external dependencies needed. This keeps your site fast and stable. Because the plugin uses WordPress core functionality, it fits smoothly into your existing setup, and it works with any theme.
How do I install Glossary?
- Download or clone the Glossary repository into your WordPress plugins directory:
- Activate the Glossary plugin in your WordPress admin panel
- Navigate to Glossary in the WordPress admin menu to start adding entries.
Frequently asked questions
Yes. Glossary is completely free and open source. You install it by downloading or cloning the repository into your WordPress plugins directory:
Start by creating a page for your glossary and add the Glossary List block to it. Then go to Glossary in your WordPress admin and open the Settings screen. Select your glossary page and save your changes. The plugin is ready to use once this page is linked.
Go to Glossary and click Add New. Enter the term as the title. Add a short description for the popover, an optional long description for the glossary page, and any synonyms you want to include. Publish the entry and it becomes part of your glossary.
The plugin scans your content for glossary terms and links only the first mention on each page. Readers can hover or focus on the term to see a short popover definition, with a link to the full glossary entry. This works automatically once you have added entries and selected your glossary page in the settings.

Try it yourself!
Download Glossary today and take the first step towards an easier-to-read website!